SpringCloud搭建使用
SpringCloud搭建使用
搭建
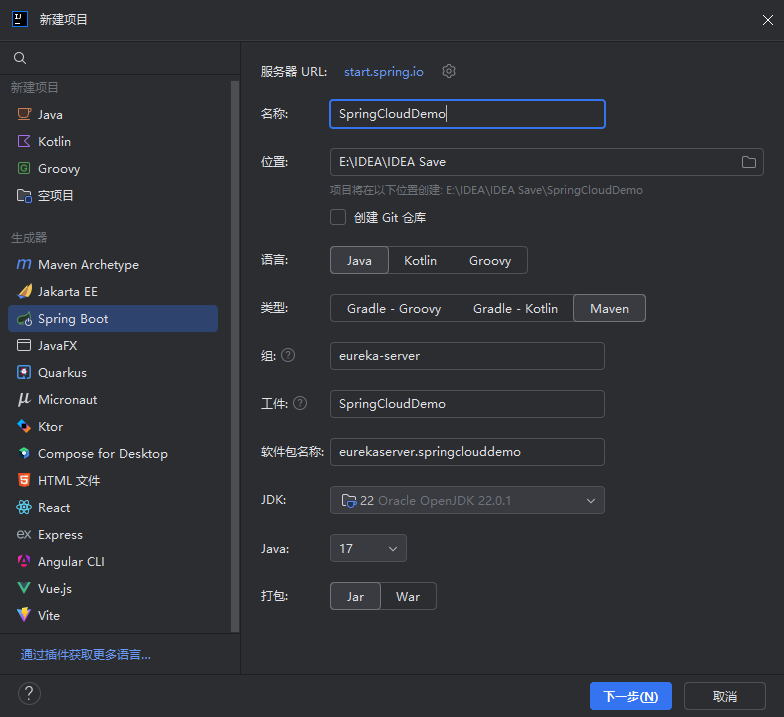
- 在IDEA创建SpringBoot项目
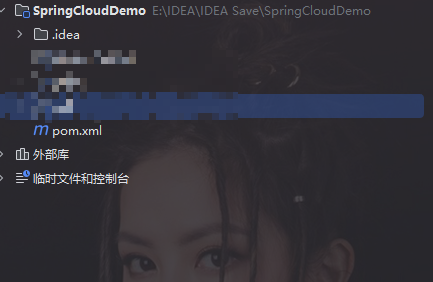
2. 将多余的文件夹删掉,如src、.mvn等。只保留.idea和pom.xml这两文件。代表这是个父工程
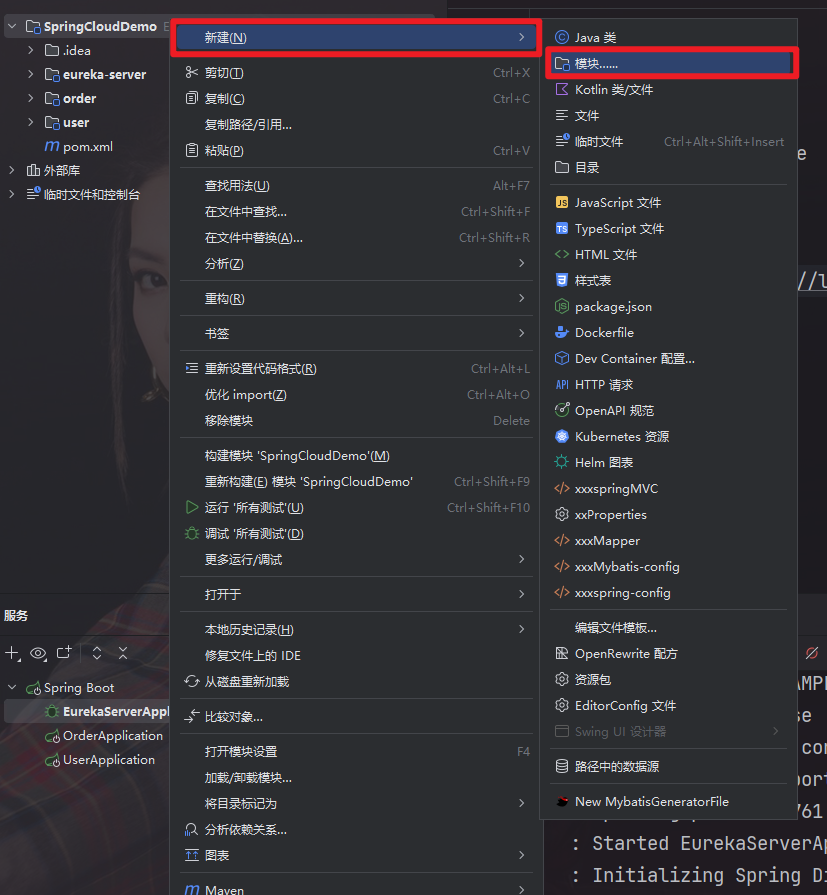
3. 在父工程中创建子工程。
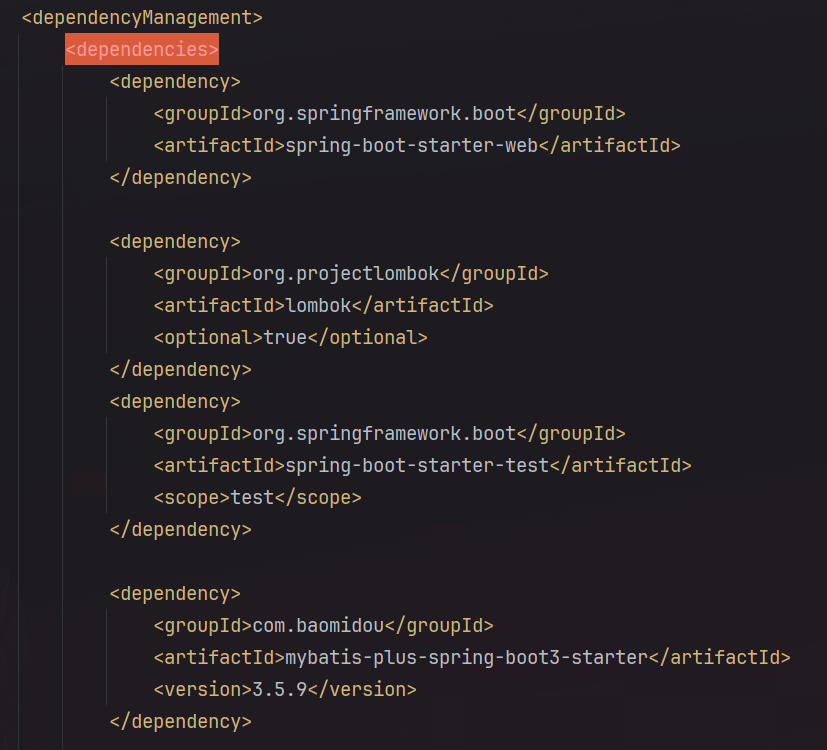
- 在父工程的pom.xml文件中,使用depencyManagement管理依赖,而子工程使用时则无需指定版本
搭建eureka-server注册中心服务
-
在父工程中引入依赖
<dependency> <groupId>org.springframework.cloud</groupId> <artifactId>spring-cloud-starter-netflix-eureka-server</artifactId> <version>4.2.0</version> </dependency>- 在子工程也需要引入,但无需指定版本
<dependency> <groupId>org.springframework.cloud</groupId> <artifactId>spring-cloud-starter-netflix-eureka-server</artifactId> </dependency>-
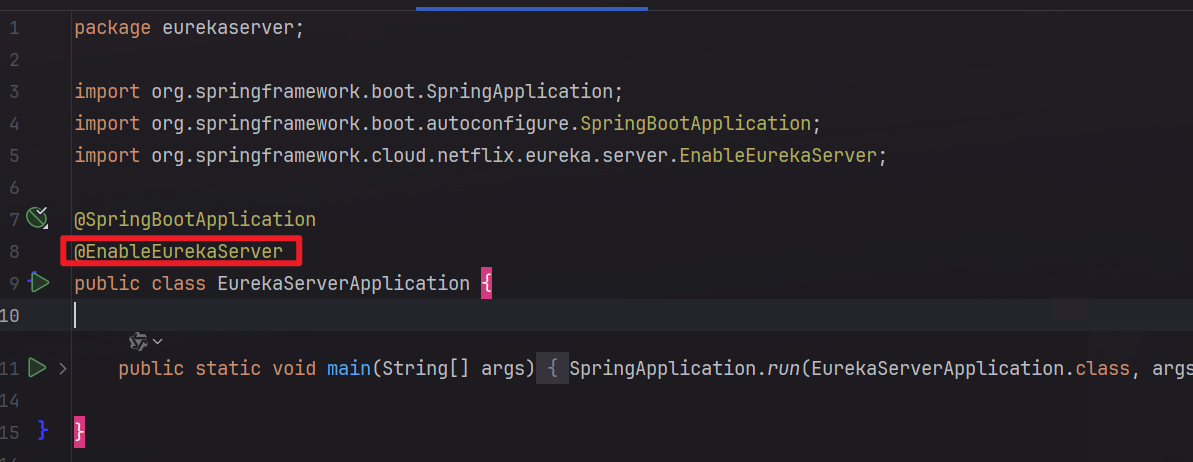
在eureka子工程中的application启动类中添加
@EnableEurekaServer开启服务
- 在application.yaml配置服务地址

配置其他子模块注册
-
引入依赖
<dependency> <groupId>org.springframework.cloud</groupId> <artifactId>spring-cloud-starter-netflix-eureka-client</artifactId> <version>4.2.0</version> </dependency> -
在yaml配置文件中配置地址
eureka:
  client:
    service-url:
      defaultZone: http://localhost:8761/eureka
spring:
  application:
    name: user-service
-
如果需要负载均衡则需要
-
将调用的地址改为eureka注册的名称
-
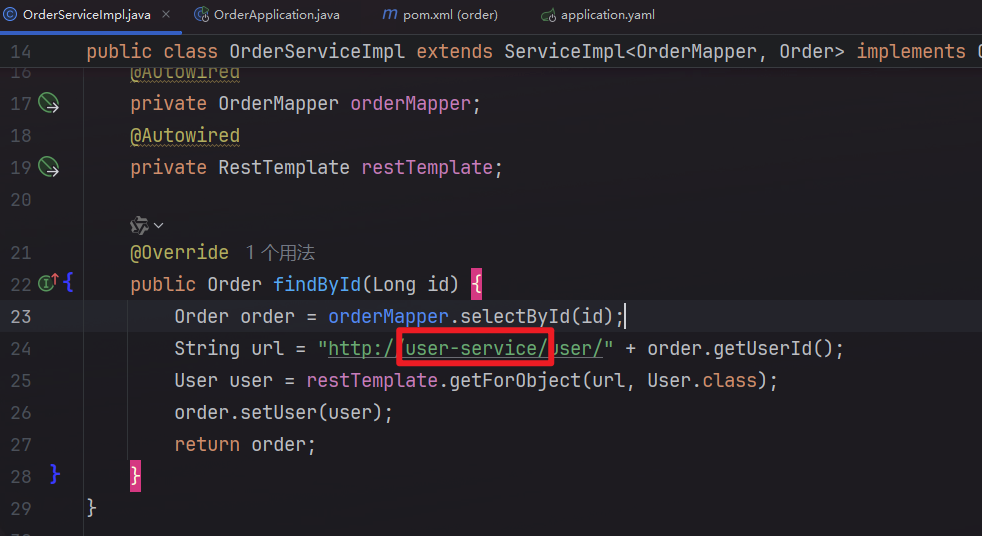
-
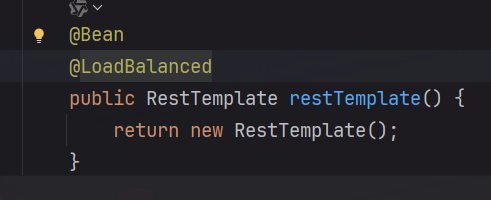
给RestTemplate添加
@LoadBalanced注解
Ribbon
负载均衡
通过定义IRule实现可以修改负载均衡规则,有两种方式:
1. 代码方式:在order-service中的OrderAppliction类中,定义一个新的IRule。这种方式,在order-service无论调谁都会使用这个均衡规则,可以理解全局配置:
@Bean
public IRule randomRule(){
    return new RandomRule()
}
- 配置文件方式:在order-service的application.yaml文件中,添加新的配置也可以修改规则。而这种则是只对某个配置。
user-service:
	ribbon:
		NFLoadBalancerRuleClassName: con.netflix.loadbalancer.RandomRule
饥饿加载(懒加载)
ribbon默认采用懒加载模式,则是第一次访问时才会加载,所以第一次访问时会耗时长些,如果想采用饥饿加载则需要配置
ribbon:
	eager-load:
		enable:true #开启饥饿加载
		clients: #指定加载的服务名称
			-user-service
搭建Nacos注册中心使用
-
下载Nacos
https://nacos.io/download/nacos-server/?spm=5238cd80.2ef5001f.0.0.3f613b7c6IZDHn -
解压压缩包,放在没有中文路径下的文件夹
-
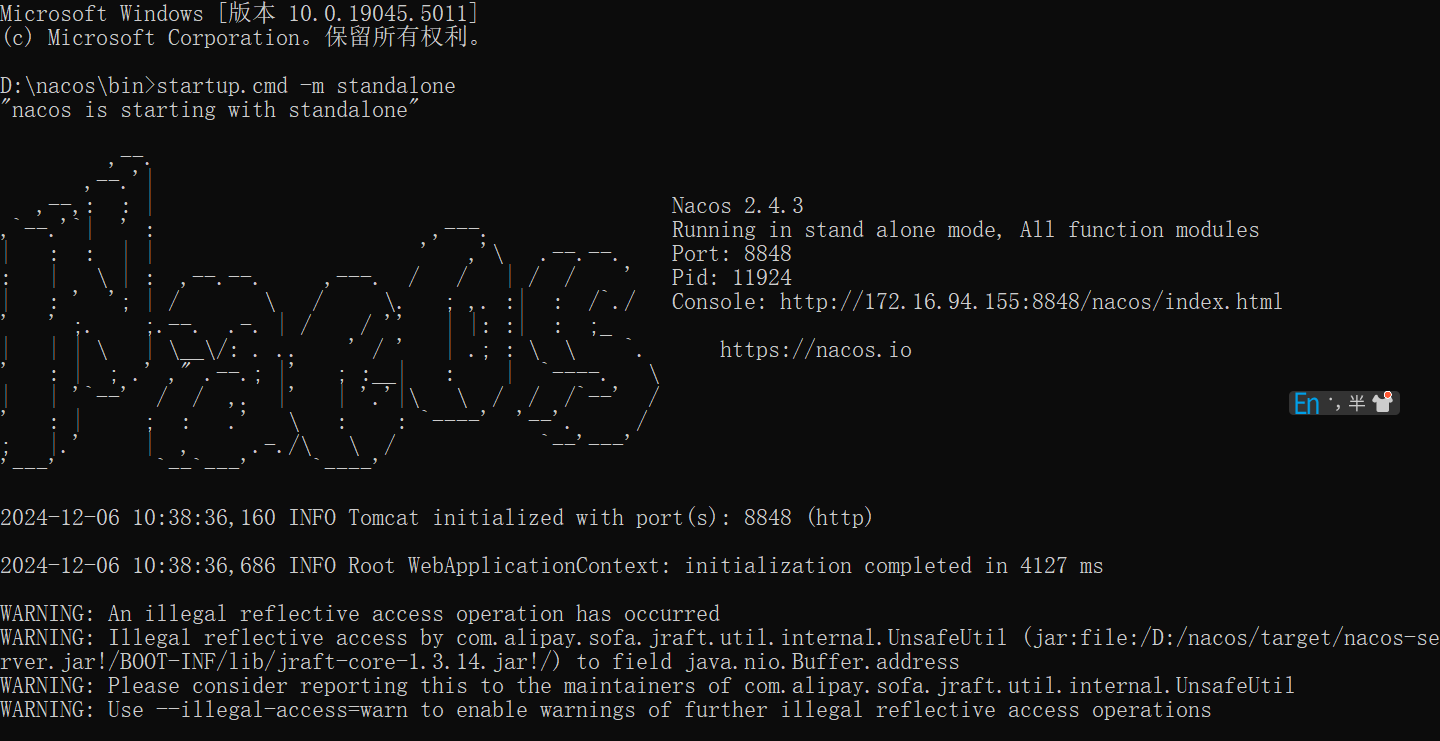
使用CMD启动
startup.cmd -m standalone
- 在父工程中引入SpringCloudAlibaba依赖
<!-- SpringCloudAlibaba依赖 -->
<dependency>
    <groupId>com.alibaba.cloud</groupId>
    <artifactId>spring-cloud-alibaba-dependencies</artifactId>
    <version>${spring-cloud-alibaba.version}</version>
    <type>pom</type>
    <scope>import</scope>
</dependency>
- 在子工程中引入alibaba的nacos依赖
<dependency>
    <groupId>com.alibaba.cloud</groupId>
    <artifactId>spring-cloud-starter-alibaba-nacos-discovery</artifactId>
</dependency>
-
修改配置文件,将eureka的配置信息注释,添加nacos配置
spring: application: # 注意:这块表示项目名称也可以表示服务名称,服务名称不能带有-,不然报错。 name: userService datasource: driver-class-name: com.mysql.cj.jdbc.Driver url: jdbc:mysql://localhost:3306/cloud_user?serverTimezone=UTC&useUnicode=true&characterEncoding=utf-8&useSSL=false&allowPublicKeyRetrieval=true username: root password: xxxxxxx # 新增的nacos配置 cloud: nacos: discovery: server-addr: 127.0.0.1:8848 # nacos服务地址 mybatis-plus: configuration: log-impl: org.apache.ibatis.logging.stdout.StdOutImpl server: port: 8081 #eureka: # client: # service-url: # defaultZone: http://localhost:8761/eureka-
在SpringBoot启动类中使用
@EnableDiscoveryClient注解package user; import org.mybatis.spring.annotation.MapperScan; import org.springframework.boot.SpringApplication; import org.springframework.boot.autoconfigure.SpringBootApplication; import org.springframework.cloud.client.discovery.EnableDiscoveryClient; @SpringBootApplication @EnableDiscoveryClient @MapperScan("user.mapper") public class UserApplication { public static void main(String[] args) { SpringApplication.run(UserApplication.class, args); } }
-
Nacos集群
在配置文件中添加cluster-name属性指定集群名称
spring:
  application:
    name: userService
  cloud:
    nacos:
      discovery:
        server-addr: 127.0.0.1:8848 # nacos服务地址
        cluster-name: HN #集群名称
Nacos负载均衡
和eureka负载均衡一致,需要编写配置文件
# Nacos服务的名称
userService:
  ribbon:
    # 负载均衡配置,优先采用相同集群
    NFLoadBanlancerRuleClassName: com.alibaba.cloud.nacos.NacosRule
配置为NacosRule负载均衡表示:优先选择同集群服务实例列表,本地集群找不到,才去其他集群寻找,确定了可用实例列表后,再采用随机负载均衡挑选实例
Nacos权重负载均衡
定义
假设集群中有两台服务器,一台新机,一台老机。老机配置访问很慢,如果用户访问请求时,而这个请求被分配到老机时用的时间很长就会让用户体验不好,这时就可以把这台老机的权重降低,当这台老机的权重降低后,Nacos会依照权重来分配,老机降低后就会降低分配给它的任务,这时就可以让老机休息休息。
使用
- 进入Nacos网页的服务详情
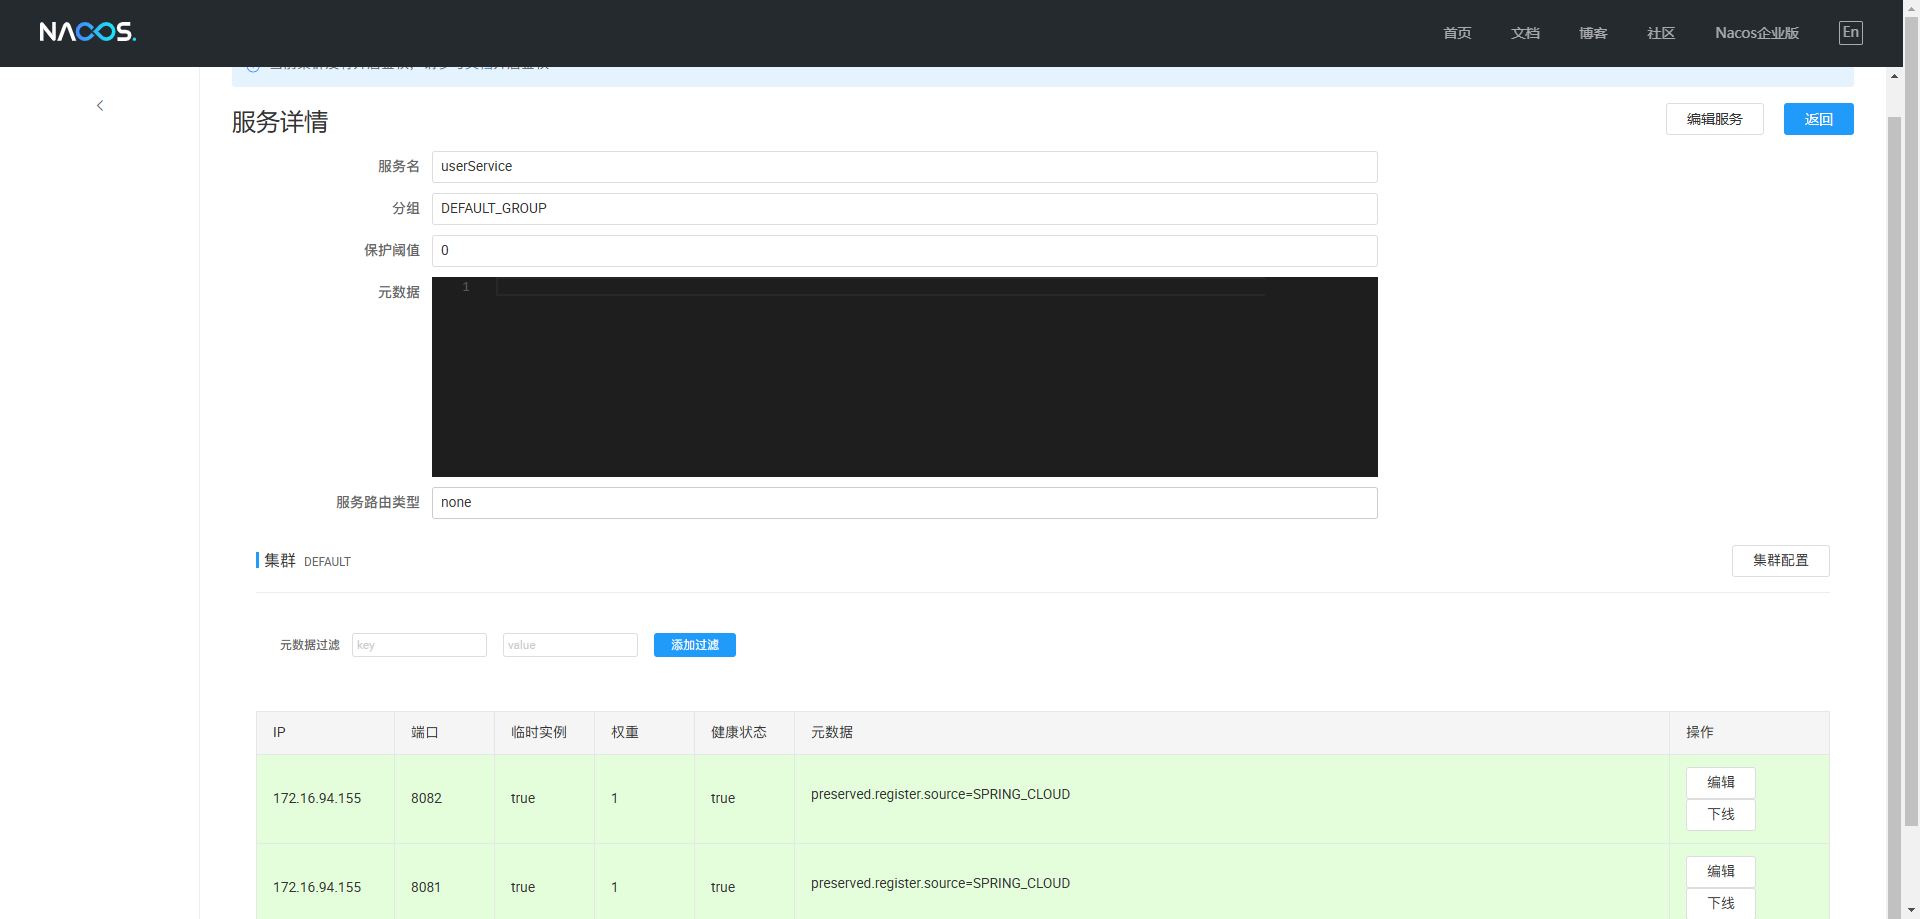
- 选择需要修改哪个服务的权重,点击编辑
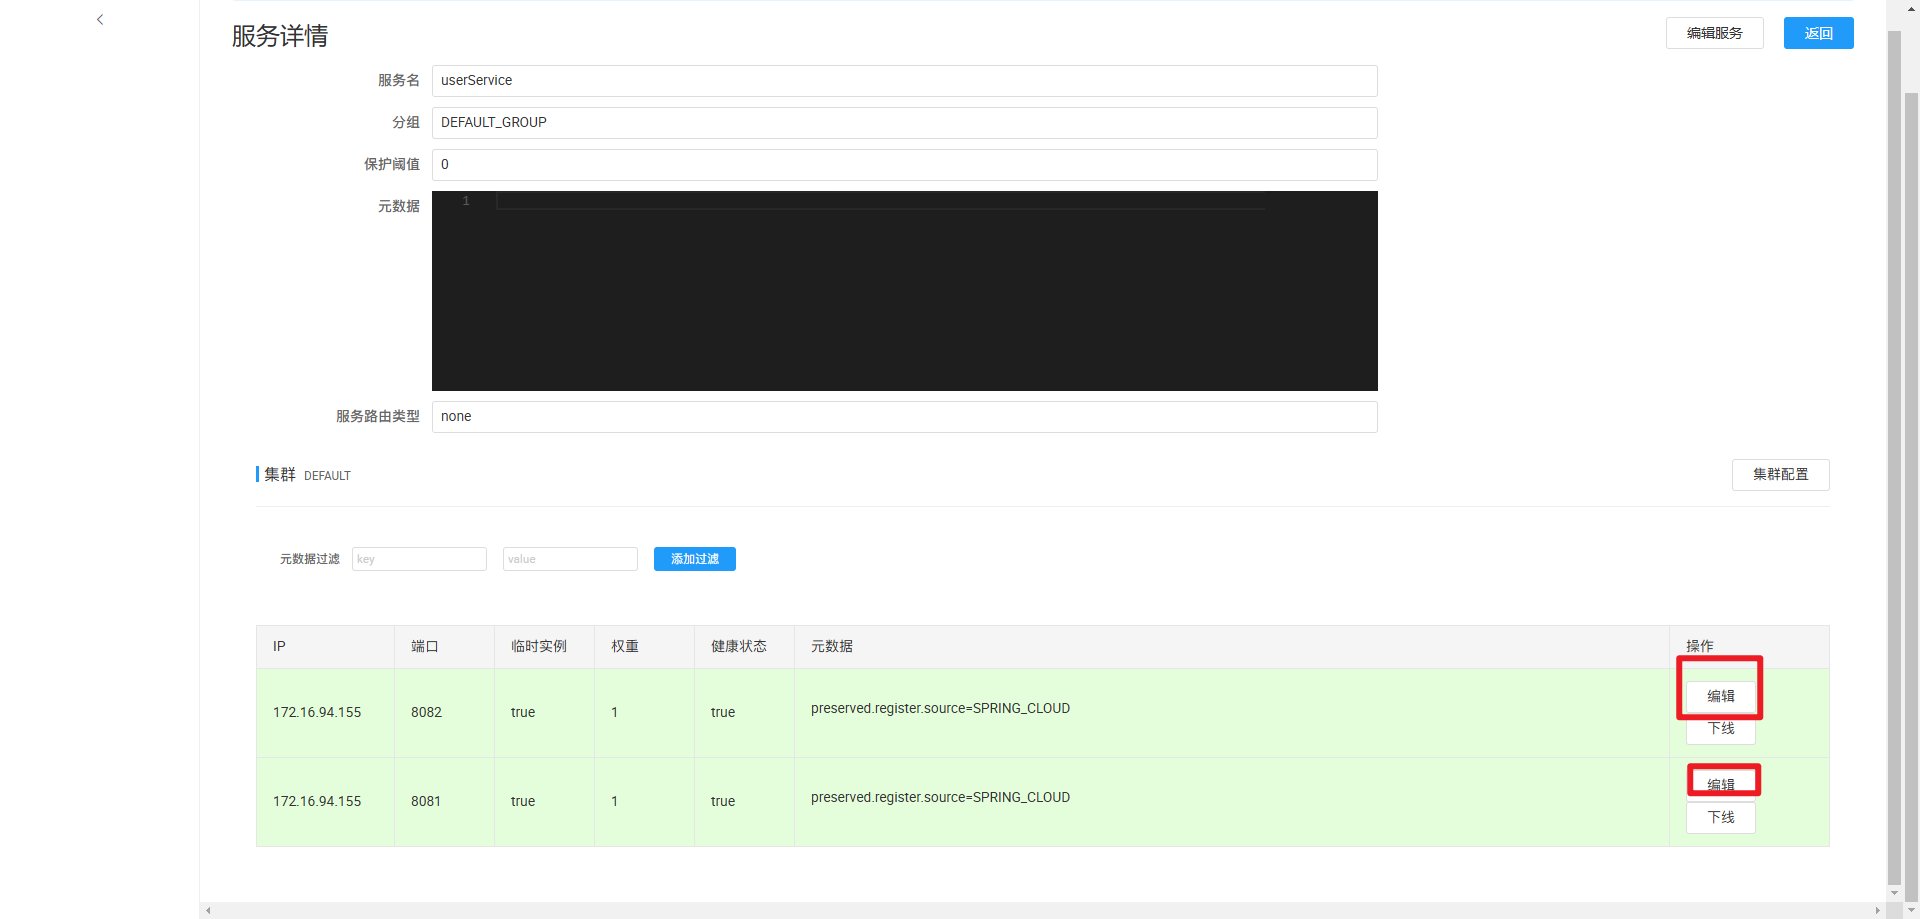
- 将它的权重降低,0-1之间
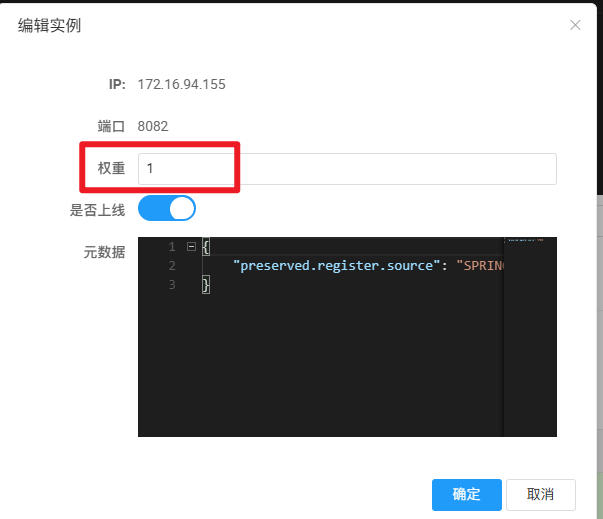
4. 权重越高,被访问的频率也就越高,当权重为0时,则完成不会被访问
Nacos环境隔离
定义
两个不同的环境不能访问,因此服务只能访问相同空间的环境
使用
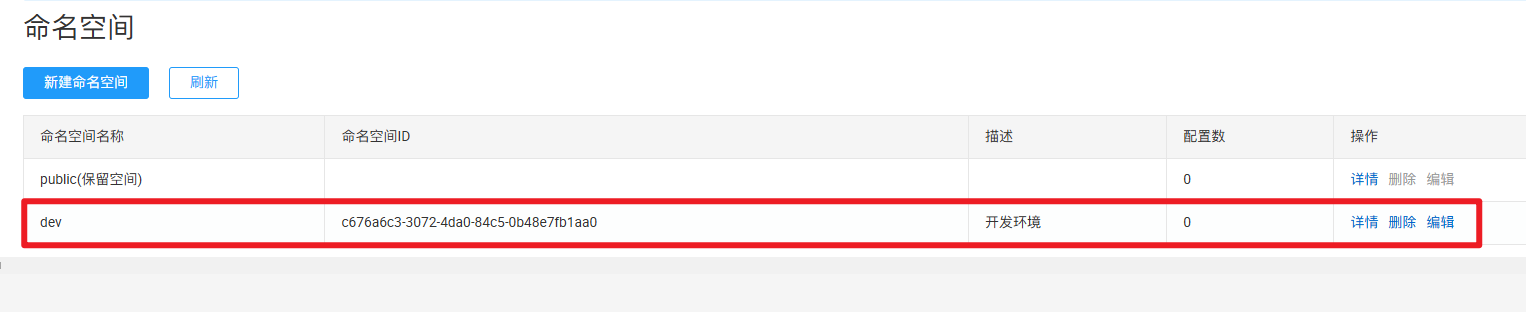
- 在nacos页面中创建命令空间
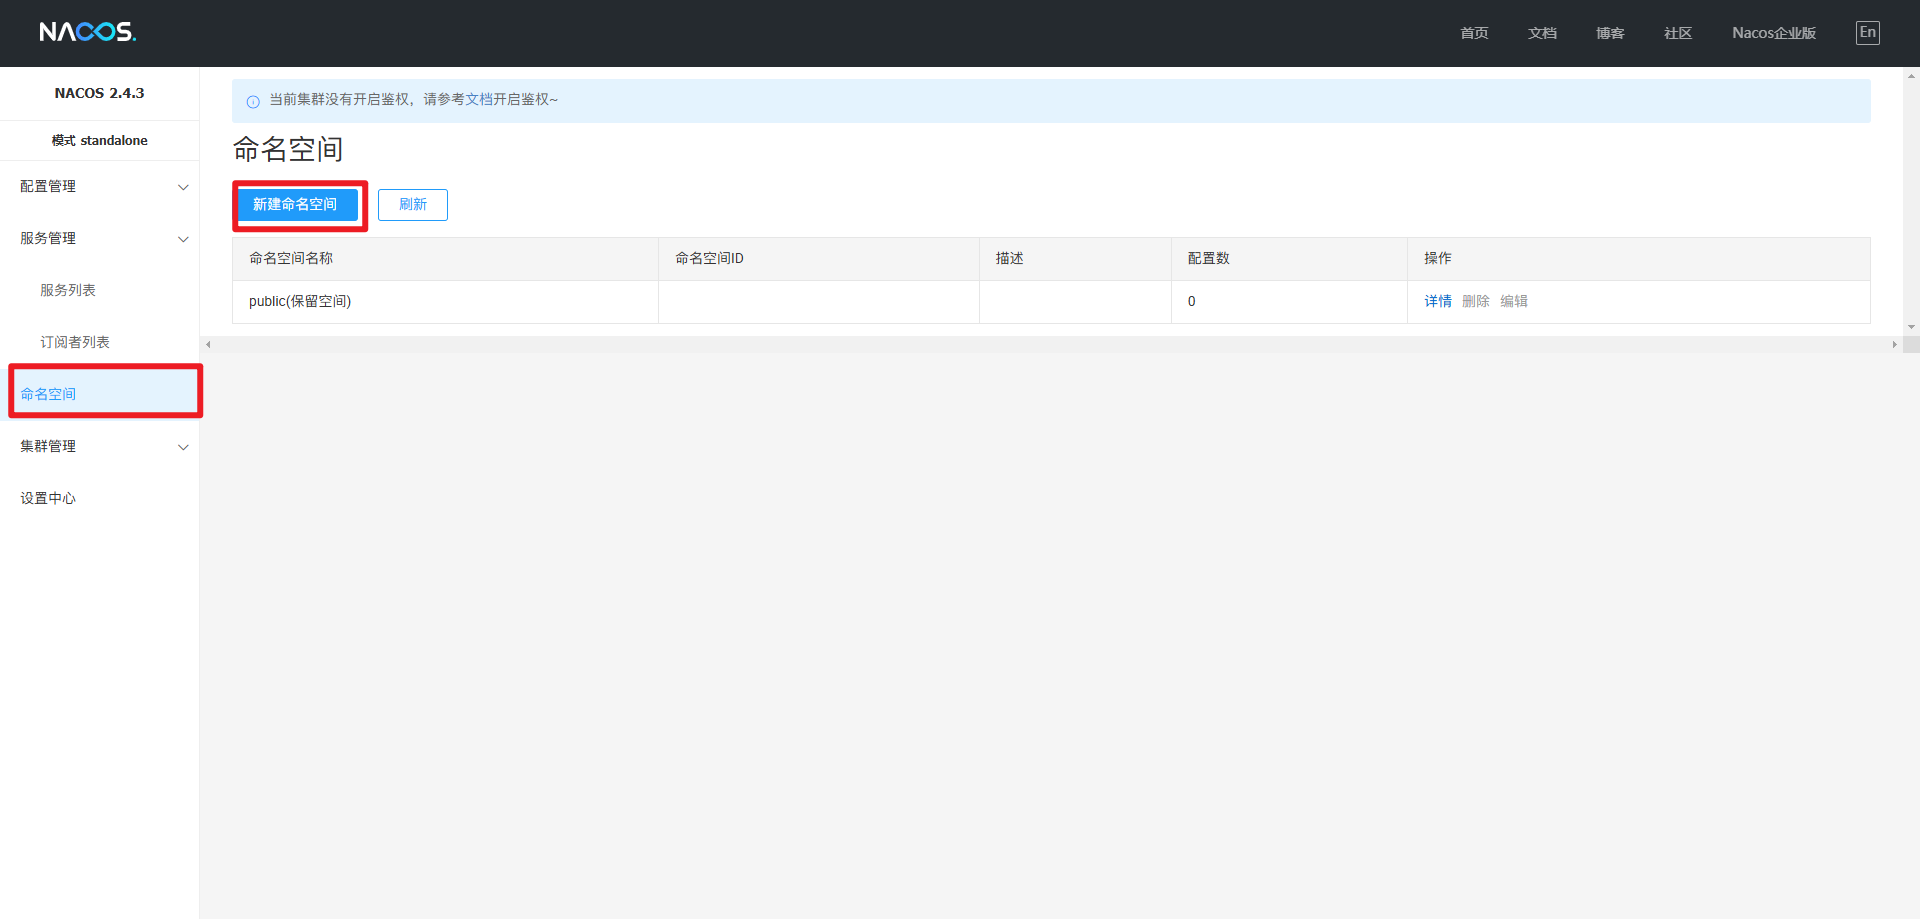
- 创建成功后,会有命名空间ID,如果想将某个访问放到该空间时,则需要再服务模块的yaml文件中添加namespace配置
- 更改某模块的命名空间,在模块的yaml文件中,添加namespace,将空间ID输入
spring:
  application:
    name: orderService

  cloud:
    nacos:
      discovery:
        server-addr: 127.0.0.1:8848 # nacos服务地址
        namespace: c676a6c3-3072-4da0-84c5-0b48e7fb1aa0 #namespace命名空间ID
- 这时,该模块就只能使用相同命名空间的服务。不同的namespace下的服务不可见
Nacos临时实例和非临时实例
定义
临时实例需要每隔30秒发送一次心跳给Nacos表示自己还活着,如果没活着,则会清除该实例,而非临时实例则是Nacos主动联系,如果没活着,不会清除该实例,而是将该实例挂着等待该实例恢复
使用
- 将服务设置为非临时实例,在某个模块的yaml配置文件中将nacos下的discovery下的ephemeral设置为false,代表该模块为非临时实例,默认为true
spring:
  application:
    name: orderService

  cloud:
    nacos:
      discovery:
        server-addr: 127.0.0.1:8848 # nacos服务地址
        ephemeral: false # 设置为非临时实例
Nacos和eureka
共同点
- 都支持服务注册和服务拉取
- 都支持服务提供者心跳方式做健康检测
区别
- Nacos支持服务端主动检测提供者状态;临时实例采用心跳模式,非临时实例采用主动检测模式
- 临时实例心跳不正常会被剔除,非临时实例则不会被剔除
- Nacos支持服务列表变更的消息推送模式,服务里诶博爱跟新更及时
- Nacos集群默认采用AP方式,当集群中存在非临时实例时,采用CP模式;eureka采用AP方式
Nacos配置管理
使用
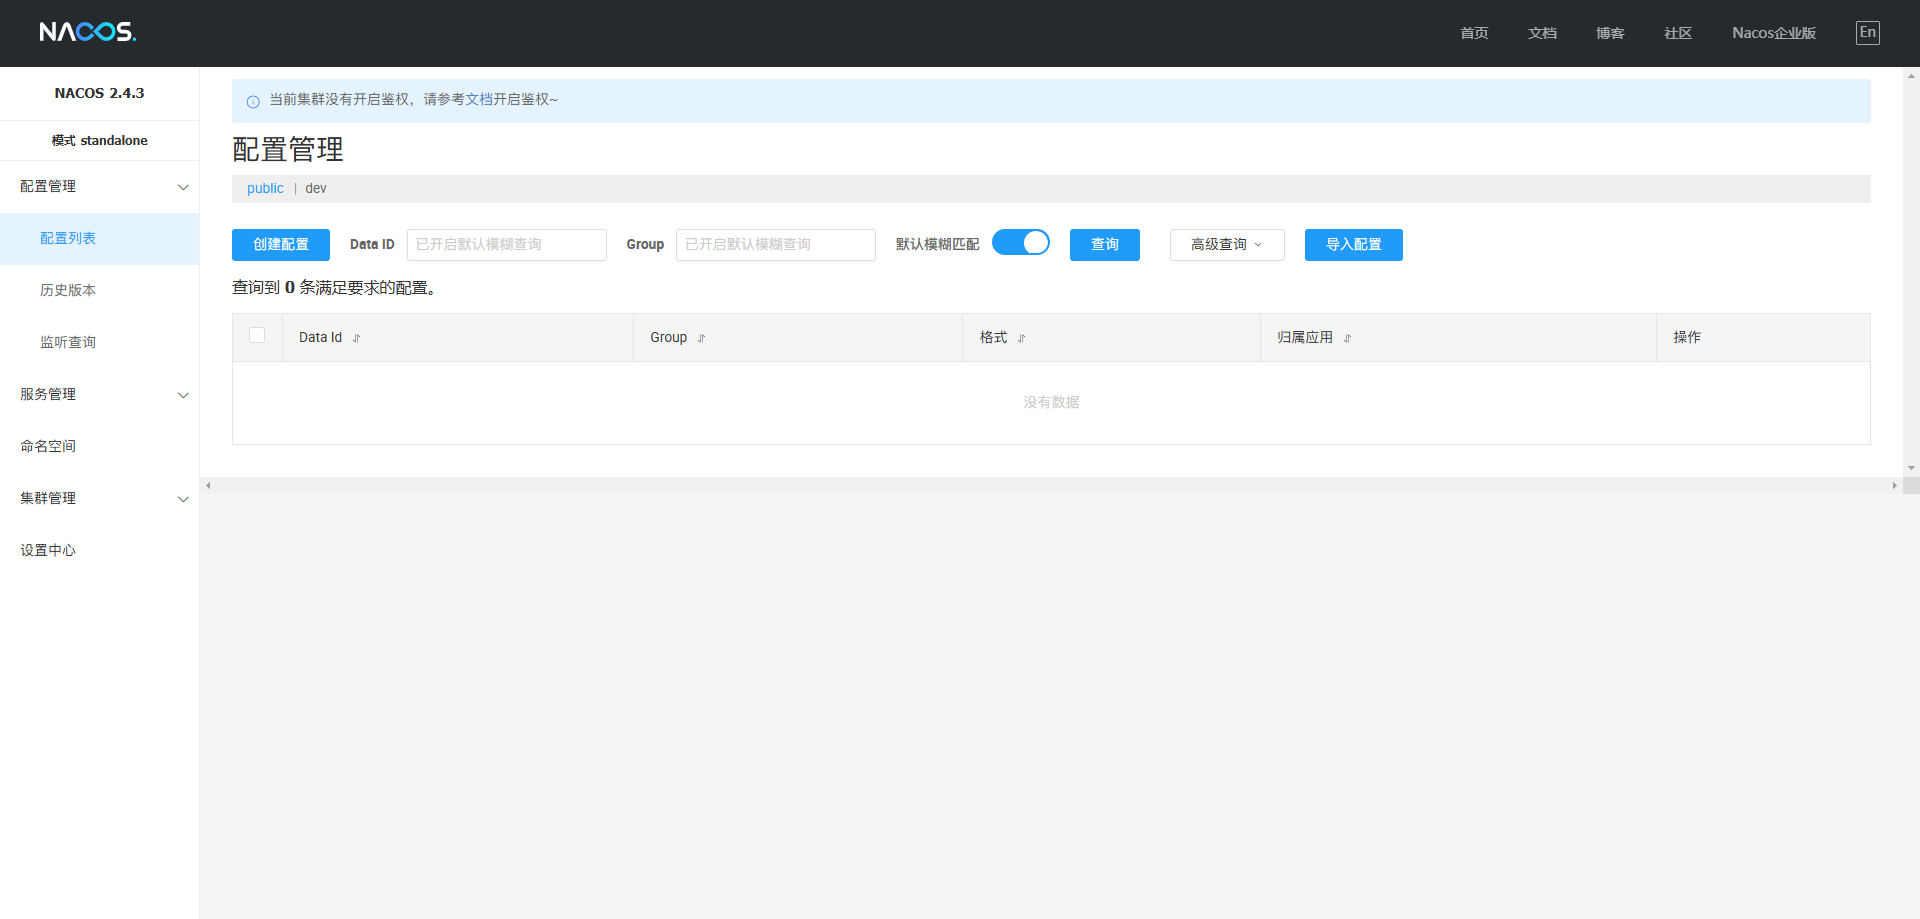
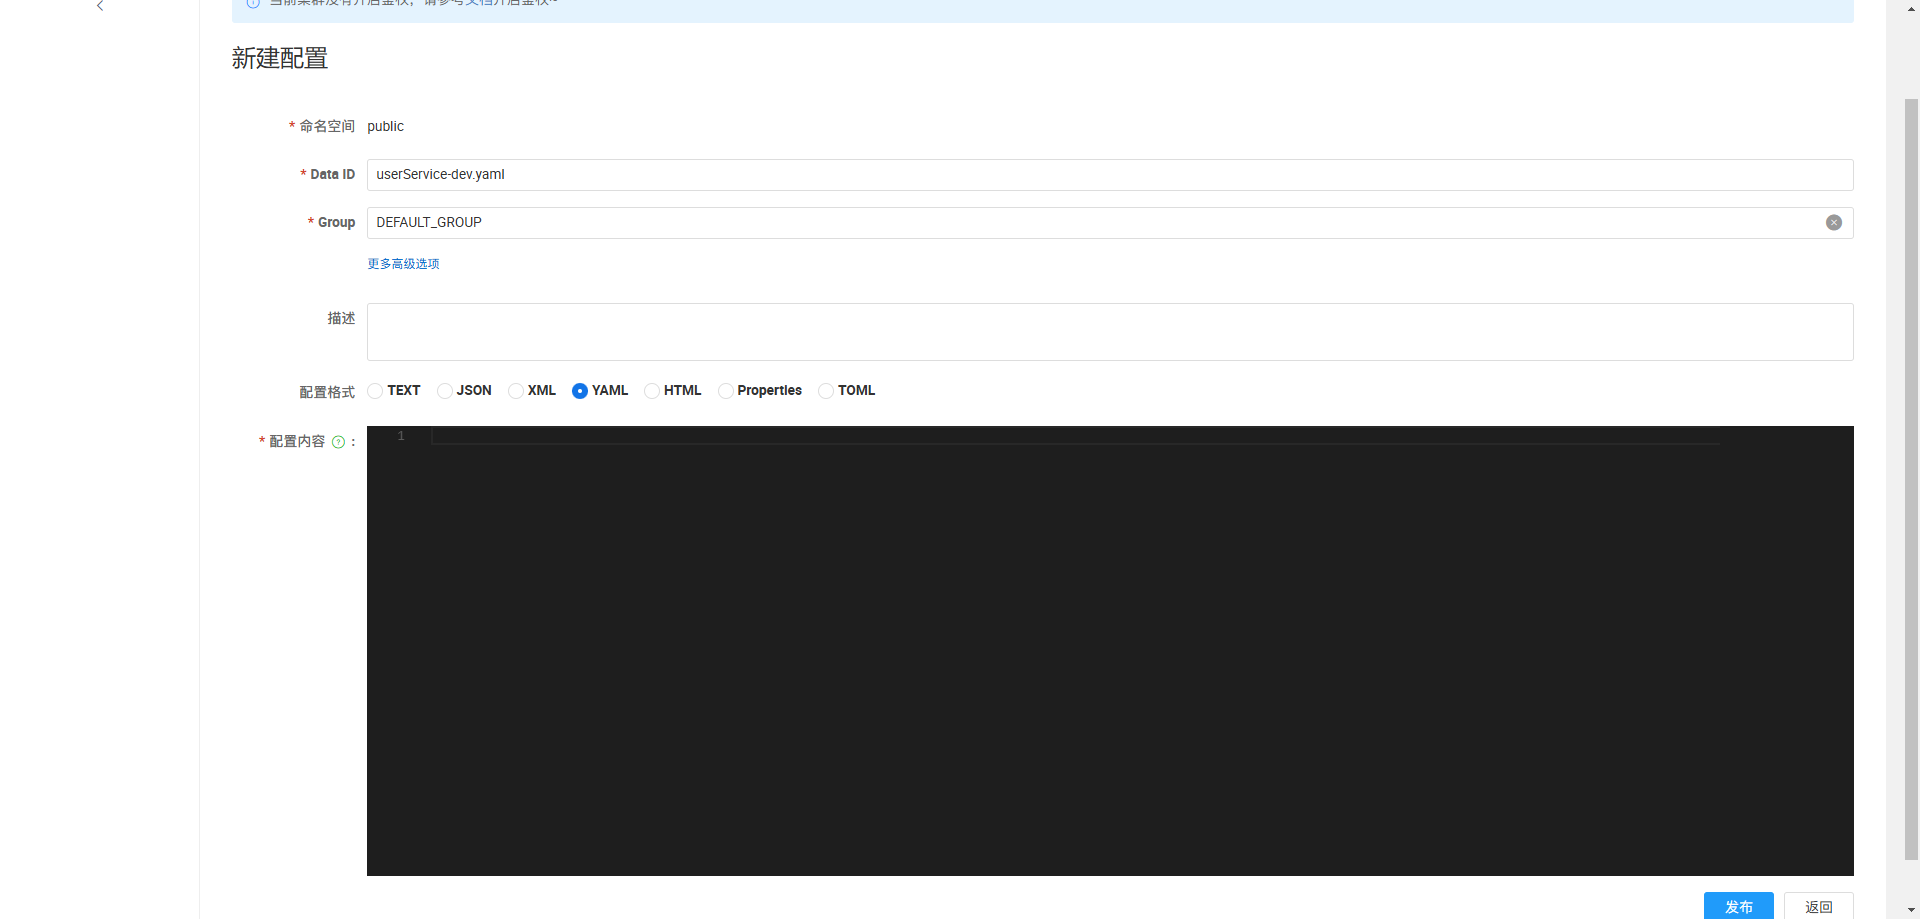
- 在Nacos页面中选中【配置管理】->【配置列表】,在该页面中点击【创建配置】
- Data ID默认取值格式为【服务名】-【环境】.yaml
- 在子模块中引入依赖Nacos配置依赖
<dependency>
    <groupId>com.alibaba.cloud</groupId>
    <artifactId>spring-cloud-starter-alibaba-nacos-config</artifactId>
</dependency>
- 在resources文件夹下
application.yaml编写配置
spring:
  application:
	# 服务名称
    name: userService
  config:
    # 引入nacos文件格式
    import: nacos:${spring.application.name}-${spring.profiles.active}.${spring.cloud.nacos.config.file-extension}
  profiles:
    # 开发环境
    active: dev
  cloud:
    nacos:
      server-addr: localhost:8848 #nacos服务地址
      config:
        file-extension: yaml  #后缀名
server:
  port: 8081
配置自动更新
Nacos中的配置文件变更后,微服务无效重启就可以感知。不过需要通过下面两种配置实现:
- 在@Value注入的变量所在的类上添加注解
@RefreshScope
package user.controller;

import org.springframework.beans.factory.annotation.Autowired;
import org.springframework.beans.factory.annotation.Value;
import org.springframework.cloud.context.config.annotation.RefreshScope;
import org.springframework.web.bind.annotation.GetMapping;
import org.springframework.web.bind.annotation.PathVariable;
import org.springframework.web.bind.annotation.RequestMapping;
import org.springframework.web.bind.annotation.RestController;
import user.config.PatternProperties;
import user.entity.User;
import user.service.UserService;

import java.time.LocalDateTime;
import java.time.format.DateTimeFormatter;

@RequestMapping("/user")
@RestController
@RefreshScope
public class UserController {

    @Autowired
    private UserService userService;

    @Value("${pattern.dateformat}")
    private String dateformat;

    @GetMapping("/{id}")
    public User findById(@PathVariable("id") Long id){
        return userService.getById(id);
    }

    @GetMapping("/now")
    public String now(){
        return LocalDateTime.now().format(DateTimeFormatter.ofPattern(dataformat));
    }

}
- 使用
@ConfiguarationProperties注解
package user.config;

import lombok.Data;
import org.springframework.boot.context.properties.ConfigurationProperties;
import org.springframework.stereotype.Component;

@Data
@Component
@ConfigurationProperties(prefix = "pattern")
public class PatternProperties {
    private String dateformat;
}
package user.controller;

import org.springframework.beans.factory.annotation.Autowired;
import org.springframework.beans.factory.annotation.Value;
import org.springframework.cloud.context.config.annotation.RefreshScope;
import org.springframework.web.bind.annotation.GetMapping;
import org.springframework.web.bind.annotation.PathVariable;
import org.springframework.web.bind.annotation.RequestMapping;
import org.springframework.web.bind.annotation.RestController;
import user.config.PatternProperties;
import user.entity.User;
import user.service.UserService;

import java.time.LocalDateTime;
import java.time.format.DateTimeFormatter;

@RequestMapping("/user")
@RestController
public class UserController {

    @Autowired
    private UserService userService;

    @Autowired
    private PatternProperties properties;

    @GetMapping("/{id}")
    public User findById(@PathVariable("id") Long id){
        return userService.getById(id);
    }

    @GetMapping("/now")
    public String now(){
        return LocalDateTime.now().format(DateTimeFormatter.ofPattern(properties.getDateformat()));
    }

}
注意:不是所有的配置都适合放在配置中心,维护起来比较麻烦,建议将一些关键参数,需要运行时调整的参数放到naos配置中心,一般都是自定义配置
多环境配置共享
微服务启动时会从nacos读取多个配置文件:
- 【spring.appliction.name】-【spring.profile.active】.yaml,例如:userService-dev.yaml
- 【spring.appliction.name】.yaml,例如:userService.yaml
无论profile如何变化,【spring.appliction.name】.yaml这个文件一定会加载,因此多环境共享配置可以写入这个文件
配置文件的优先级
- 服务名-profile.yaml > 服务名称.yaml > 本地配置
nacos集群搭建步骤
- 搭建Mysql集群并初始化数据表
/*
 * Copyright 1999-2018 Alibaba Group Holding Ltd.
 *
 * Licensed under the Apache License, Version 2.0 (the "License");
 * you may not use this file except in compliance with the License.
 * You may obtain a copy of the License at
 *
 *      http://www.apache.org/licenses/LICENSE-2.0
 *
 * Unless required by applicable law or agreed to in writing, software
 * distributed under the License is distributed on an "AS IS" BASIS,
 * WITHOUT WARRANTIES OR CONDITIONS OF ANY KIND, either express or implied.
 * See the License for the specific language governing permissions and
 * limitations under the License.
 */

/******************************************/
/*   表名称 = config_info                  */
/******************************************/
CREATE TABLE `config_info` (
  `id` bigint(20) NOT NULL AUTO_INCREMENT COMMENT 'id',
  `data_id` varchar(255) NOT NULL COMMENT 'data_id',
  `group_id` varchar(128) DEFAULT NULL COMMENT 'group_id',
  `content` longtext NOT NULL COMMENT 'content',
  `md5` varchar(32) DEFAULT NULL COMMENT 'md5',
  `gmt_create` datetime NOT NULL DEFAULT CURRENT_TIMESTAMP COMMENT '创建时间',
  `gmt_modified` datetime NOT NULL DEFAULT CURRENT_TIMESTAMP COMMENT '修改时间',
  `src_user` text COMMENT 'source user',
  `src_ip` varchar(50) DEFAULT NULL COMMENT 'source ip',
  `app_name` varchar(128) DEFAULT NULL COMMENT 'app_name',
  `tenant_id` varchar(128) DEFAULT '' COMMENT '租户字段',
  `c_desc` varchar(256) DEFAULT NULL COMMENT 'configuration description',
  `c_use` varchar(64) DEFAULT NULL COMMENT 'configuration usage',
  `effect` varchar(64) DEFAULT NULL COMMENT '配置生效的描述',
  `type` varchar(64) DEFAULT NULL COMMENT '配置的类型',
  `c_schema` text COMMENT '配置的模式',
  `encrypted_data_key` varchar(1024) NOT NULL DEFAULT '' COMMENT '密钥',
  PRIMARY KEY (`id`),
  UNIQUE KEY `uk_configinfo_datagrouptenant` (`data_id`,`group_id`,`tenant_id`)
) ENGINE=InnoDB DEFAULT CHARSET=utf8 COLLATE=utf8_bin COMMENT='config_info';

/******************************************/
/*   表名称 = config_info_aggr             */
/******************************************/
CREATE TABLE `config_info_aggr` (
  `id` bigint(20) NOT NULL AUTO_INCREMENT COMMENT 'id',
  `data_id` varchar(255) NOT NULL COMMENT 'data_id',
  `group_id` varchar(128) NOT NULL COMMENT 'group_id',
  `datum_id` varchar(255) NOT NULL COMMENT 'datum_id',
  `content` longtext NOT NULL COMMENT '内容',
  `gmt_modified` datetime NOT NULL COMMENT '修改时间',
  `app_name` varchar(128) DEFAULT NULL COMMENT 'app_name',
  `tenant_id` varchar(128) DEFAULT '' COMMENT '租户字段',
  PRIMARY KEY (`id`),
  UNIQUE KEY `uk_configinfoaggr_datagrouptenantdatum` (`data_id`,`group_id`,`tenant_id`,`datum_id`)
) ENGINE=InnoDB DEFAULT CHARSET=utf8 COLLATE=utf8_bin COMMENT='增加租户字段';


/******************************************/
/*   表名称 = config_info_beta             */
/******************************************/
CREATE TABLE `config_info_beta` (
  `id` bigint(20) NOT NULL AUTO_INCREMENT COMMENT 'id',
  `data_id` varchar(255) NOT NULL COMMENT 'data_id',
  `group_id` varchar(128) NOT NULL COMMENT 'group_id',
  `app_name` varchar(128) DEFAULT NULL COMMENT 'app_name',
  `content` longtext NOT NULL COMMENT 'content',
  `beta_ips` varchar(1024) DEFAULT NULL COMMENT 'betaIps',
  `md5` varchar(32) DEFAULT NULL COMMENT 'md5',
  `gmt_create` datetime NOT NULL DEFAULT CURRENT_TIMESTAMP COMMENT '创建时间',
  `gmt_modified` datetime NOT NULL DEFAULT CURRENT_TIMESTAMP COMMENT '修改时间',
  `src_user` text COMMENT 'source user',
  `src_ip` varchar(50) DEFAULT NULL COMMENT 'source ip',
  `tenant_id` varchar(128) DEFAULT '' COMMENT '租户字段',
  `encrypted_data_key` varchar(1024) NOT NULL DEFAULT '' COMMENT '密钥',
  PRIMARY KEY (`id`),
  UNIQUE KEY `uk_configinfobeta_datagrouptenant` (`data_id`,`group_id`,`tenant_id`)
) ENGINE=InnoDB DEFAULT CHARSET=utf8 COLLATE=utf8_bin COMMENT='config_info_beta';

/******************************************/
/*   表名称 = config_info_tag              */
/******************************************/
CREATE TABLE `config_info_tag` (
  `id` bigint(20) NOT NULL AUTO_INCREMENT COMMENT 'id',
  `data_id` varchar(255) NOT NULL COMMENT 'data_id',
  `group_id` varchar(128) NOT NULL COMMENT 'group_id',
  `tenant_id` varchar(128) DEFAULT '' COMMENT 'tenant_id',
  `tag_id` varchar(128) NOT NULL COMMENT 'tag_id',
  `app_name` varchar(128) DEFAULT NULL COMMENT 'app_name',
  `content` longtext NOT NULL COMMENT 'content',
  `md5` varchar(32) DEFAULT NULL COMMENT 'md5',
  `gmt_create` datetime NOT NULL DEFAULT CURRENT_TIMESTAMP COMMENT '创建时间',
  `gmt_modified` datetime NOT NULL DEFAULT CURRENT_TIMESTAMP COMMENT '修改时间',
  `src_user` text COMMENT 'source user',
  `src_ip` varchar(50) DEFAULT NULL COMMENT 'source ip',
  PRIMARY KEY (`id`),
  UNIQUE KEY `uk_configinfotag_datagrouptenanttag` (`data_id`,`group_id`,`tenant_id`,`tag_id`)
) ENGINE=InnoDB DEFAULT CHARSET=utf8 COLLATE=utf8_bin COMMENT='config_info_tag';

/******************************************/
/*   表名称 = config_tags_relation         */
/******************************************/
CREATE TABLE `config_tags_relation` (
  `id` bigint(20) NOT NULL COMMENT 'id',
  `tag_name` varchar(128) NOT NULL COMMENT 'tag_name',
  `tag_type` varchar(64) DEFAULT NULL COMMENT 'tag_type',
  `data_id` varchar(255) NOT NULL COMMENT 'data_id',
  `group_id` varchar(128) NOT NULL COMMENT 'group_id',
  `tenant_id` varchar(128) DEFAULT '' COMMENT 'tenant_id',
  `nid` bigint(20) NOT NULL AUTO_INCREMENT COMMENT 'nid, 自增长标识',
  PRIMARY KEY (`nid`),
  UNIQUE KEY `uk_configtagrelation_configidtag` (`id`,`tag_name`,`tag_type`),
  KEY `idx_tenant_id` (`tenant_id`)
) ENGINE=InnoDB DEFAULT CHARSET=utf8 COLLATE=utf8_bin COMMENT='config_tag_relation';

/******************************************/
/*   表名称 = group_capacity               */
/******************************************/
CREATE TABLE `group_capacity` (
  `id` bigint(20) unsigned NOT NULL AUTO_INCREMENT COMMENT '主键ID',
  `group_id` varchar(128) NOT NULL DEFAULT '' COMMENT 'Group ID,空字符表示整个集群',
  `quota` int(10) unsigned NOT NULL DEFAULT '0' COMMENT '配额,0表示使用默认值',
  `usage` int(10) unsigned NOT NULL DEFAULT '0' COMMENT '使用量',
  `max_size` int(10) unsigned NOT NULL DEFAULT '0' COMMENT '单个配置大小上限,单位为字节,0表示使用默认值',
  `max_aggr_count` int(10) unsigned NOT NULL DEFAULT '0' COMMENT '聚合子配置最大个数,,0表示使用默认值',
  `max_aggr_size` int(10) unsigned NOT NULL DEFAULT '0' COMMENT '单个聚合数据的子配置大小上限,单位为字节,0表示使用默认值',
  `max_history_count` int(10) unsigned NOT NULL DEFAULT '0' COMMENT '最大变更历史数量',
  `gmt_create` datetime NOT NULL DEFAULT CURRENT_TIMESTAMP COMMENT '创建时间',
  `gmt_modified` datetime NOT NULL DEFAULT CURRENT_TIMESTAMP COMMENT '修改时间',
  PRIMARY KEY (`id`),
  UNIQUE KEY `uk_group_id` (`group_id`)
) ENGINE=InnoDB DEFAULT CHARSET=utf8 COLLATE=utf8_bin COMMENT='集群、各Group容量信息表';

/******************************************/
/*   表名称 = his_config_info              */
/******************************************/
CREATE TABLE `his_config_info` (
  `id` bigint(20) unsigned NOT NULL COMMENT 'id',
  `nid` bigint(20) unsigned NOT NULL AUTO_INCREMENT COMMENT 'nid, 自增标识',
  `data_id` varchar(255) NOT NULL COMMENT 'data_id',
  `group_id` varchar(128) NOT NULL COMMENT 'group_id',
  `app_name` varchar(128) DEFAULT NULL COMMENT 'app_name',
  `content` longtext NOT NULL COMMENT 'content',
  `md5` varchar(32) DEFAULT NULL COMMENT 'md5',
  `gmt_create` datetime NOT NULL DEFAULT CURRENT_TIMESTAMP COMMENT '创建时间',
  `gmt_modified` datetime NOT NULL DEFAULT CURRENT_TIMESTAMP COMMENT '修改时间',
  `src_user` text COMMENT 'source user',
  `src_ip` varchar(50) DEFAULT NULL COMMENT 'source ip',
  `op_type` char(10) DEFAULT NULL COMMENT 'operation type',
  `tenant_id` varchar(128) DEFAULT '' COMMENT '租户字段',
   `encrypted_data_key` varchar(1024) NOT NULL DEFAULT '' COMMENT '密钥',
  PRIMARY KEY (`nid`),
  KEY `idx_gmt_create` (`gmt_create`),
  KEY `idx_gmt_modified` (`gmt_modified`),
  KEY `idx_did` (`data_id`)
) ENGINE=InnoDB DEFAULT CHARSET=utf8 COLLATE=utf8_bin COMMENT='多租户改造';


/******************************************/
/*   表名称 = tenant_capacity              */
/******************************************/
CREATE TABLE `tenant_capacity` (
  `id` bigint(20) unsigned NOT NULL AUTO_INCREMENT COMMENT '主键ID',
  `tenant_id` varchar(128) NOT NULL DEFAULT '' COMMENT 'Tenant ID',
  `quota` int(10) unsigned NOT NULL DEFAULT '0' COMMENT '配额,0表示使用默认值',
  `usage` int(10) unsigned NOT NULL DEFAULT '0' COMMENT '使用量',
  `max_size` int(10) unsigned NOT NULL DEFAULT '0' COMMENT '单个配置大小上限,单位为字节,0表示使用默认值',
  `max_aggr_count` int(10) unsigned NOT NULL DEFAULT '0' COMMENT '聚合子配置最大个数',
  `max_aggr_size` int(10) unsigned NOT NULL DEFAULT '0' COMMENT '单个聚合数据的子配置大小上限,单位为字节,0表示使用默认值',
  `max_history_count` int(10) unsigned NOT NULL DEFAULT '0' COMMENT '最大变更历史数量',
  `gmt_create` datetime NOT NULL DEFAULT CURRENT_TIMESTAMP COMMENT '创建时间',
  `gmt_modified` datetime NOT NULL DEFAULT CURRENT_TIMESTAMP COMMENT '修改时间',
  PRIMARY KEY (`id`),
  UNIQUE KEY `uk_tenant_id` (`tenant_id`)
) ENGINE=InnoDB DEFAULT CHARSET=utf8 COLLATE=utf8_bin COMMENT='租户容量信息表';


CREATE TABLE `tenant_info` (
  `id` bigint(20) NOT NULL AUTO_INCREMENT COMMENT 'id',
  `kp` varchar(128) NOT NULL COMMENT 'kp',
  `tenant_id` varchar(128) default '' COMMENT 'tenant_id',
  `tenant_name` varchar(128) default '' COMMENT 'tenant_name',
  `tenant_desc` varchar(256) DEFAULT NULL COMMENT 'tenant_desc',
  `create_source` varchar(32) DEFAULT NULL COMMENT 'create_source',
  `gmt_create` bigint(20) NOT NULL COMMENT '创建时间',
  `gmt_modified` bigint(20) NOT NULL COMMENT '修改时间',
  PRIMARY KEY (`id`),
  UNIQUE KEY `uk_tenant_info_kptenantid` (`kp`,`tenant_id`),
  KEY `idx_tenant_id` (`tenant_id`)
) ENGINE=InnoDB DEFAULT CHARSET=utf8 COLLATE=utf8_bin COMMENT='tenant_info';

CREATE TABLE `users` (
	`username` varchar(50) NOT NULL PRIMARY KEY COMMENT 'username',
	`password` varchar(500) NOT NULL COMMENT 'password',
	`enabled` boolean NOT NULL COMMENT 'enabled'
);

CREATE TABLE `roles` (
	`username` varchar(50) NOT NULL COMMENT 'username',
	`role` varchar(50) NOT NULL COMMENT 'role',
	UNIQUE INDEX `idx_user_role` (`username` ASC, `role` ASC) USING BTREE
);

CREATE TABLE `permissions` (
    `role` varchar(50) NOT NULL COMMENT 'role',
    `resource` varchar(128) NOT NULL COMMENT 'resource',
    `action` varchar(8) NOT NULL COMMENT 'action',
    UNIQUE INDEX `uk_role_permission` (`role`,`resource`,`action`) USING BTREE
);
-
下载nacos
-
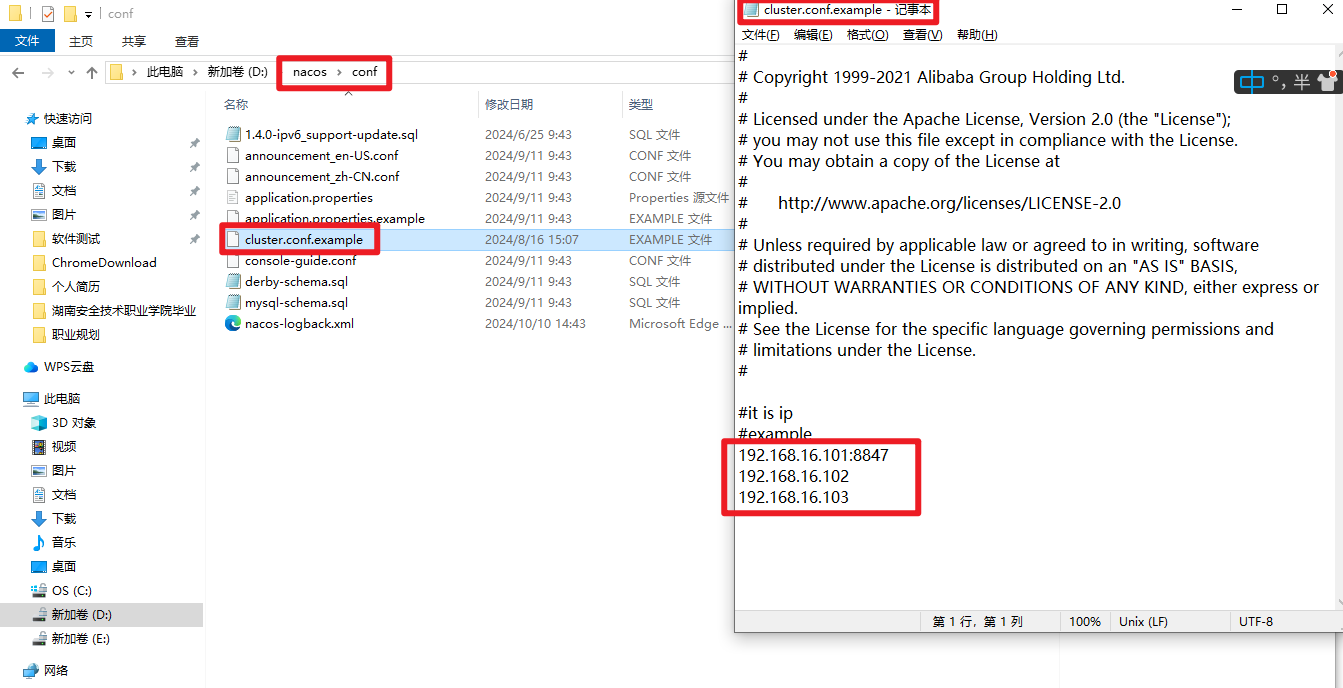
修改集群配置(节点信息)、数据库配置:在nacos的解压目录nacos/的conf目录下,有配置文件cluster.conf,请每行配置成ip(请配置3个或3个以上节点)
在conf/application.properties文件,增加支持MySQL数据源配置,添加MySQL数据源的url、用户名和密码。
spring.sql.init.platform=mysql

db.num=1
db.url.0=jdbc:mysql://数据库地址:端口/数据库名称?characterEncoding=utf8&connectTimeout=1000&socketTimeout=3000&autoReconnect=true
db.user=账号
db.password=密码
- 分别启动多个nacos节点
- nginx反向代理
Http客户端Feign的使用
定义
使用RestTemplate调用服务显得太臃肿,不好维护,这时就可以使用Feign来进行调用服务
使用
- 在消费者子模块引入Feign依赖
<dependency>
    <groupId>org.springframework.cloud</groupId>
    <artifactId>spring-cloud-starter-openfeign</artifactId>
</dependency>
- 给子模块启动类中添加
@EnableFeignClients注解
package order;

import org.mybatis.spring.annotation.MapperScan;
import org.springframework.boot.SpringApplication;
import org.springframework.boot.autoconfigure.SpringBootApplication;
import org.springframework.cloud.client.discovery.EnableDiscoveryClient;
import org.springframework.cloud.openfeign.EnableFeignClients;

@SpringBootApplication
@EnableDiscoveryClient
@EnableFeignClients  # 开启Feign注解
@MapperScan("order.mapper")
public class OrderApplication {

    public static void main(String[] args) {
        SpringApplication.run(OrderApplication.class, args);
    }

}
-
编写FeignClient接口
package order.clients; import org.springframework.cloud.openfeign.FeignClient; import org.springframework.web.bind.annotation.GetMapping; import org.springframework.web.bind.annotation.PathVariable; import user.entity.User; @FeignClient("userService") public interface UserClient { @GetMapping("/user/{id}") User findById(@PathVariable("id") Long id); } -
使用FeignClient中定义的方法代替RestTemplate
package order.service.impl;

import com.baomidou.mybatisplus.extension.service.impl.ServiceImpl;
import order.clients.UserClient;
import order.entity.Order;
import order.mapper.OrderMapper;
import org.springframework.beans.factory.annotation.Autowired;
import org.springframework.stereotype.Service;
import order.service.OrderService;
import org.springframework.web.client.RestTemplate;
import user.entity.User;
import user.service.UserService;

@Service
public class OrderServiceImpl extends ServiceImpl<OrderMapper, Order> implements OrderService {

    @Autowired
    private OrderMapper orderMapper;

    @Autowired
    private UserClient userClient;

    @Override
    public Order findById(Long id) {
        Order order = orderMapper.selectById(id);
        User user = userClient.findById(order.getUserId());
        order.setUser(user);
        return order;
    }


    //@Autowired
    //private RestTemplate restTemplate;
    //@Override
    //public Order findById(Long id) {
    //    Order order = orderMapper.selectById(id);
    //    String url = "http://userService/user/" + order.getUserId();
    //    User user = restTemplate.getForObject(url, User.class);
    //    order.setUser(user);
    //    return order;
    //}
}
自定义Feign配置
配置Feign日志有两种方式:
方式一:配置文件方式
- 全局生效
# feign配置
openfeign:
  client:
    config:
      default:
        loggerLevel: FULL
- 局部生效
# feign配置
openfeign:
  client:
    config:
      userService: #服务名称
        loggerLevel: FULL
方式二:Java代码方式
-
全局生效
- 添加feign的日志配置文件
package order.config; import feign.Logger; import org.springframework.context.annotation.Bean; public class DefaultFeignConfiguration { @Bean public Logger.Level logger(){ return Logger.Level.FULL; } }- 在子模块启动类中的
@EnableFeignClients注解中设置defaultConfiguration值
@EnableFeignClients(defaultConfiguration = DefaultFeignConfiguration.class ) -
局部生效
- 在client接口类中的
@FeignClient()单独添加
- 在client接口类中的
@FeignClient(value = "userService", configuration = DefaultFeignConfiguration.class)
Feign性能优化:配置连接池
使用httpclient或OKhttp代替URLConnection
- 引入httpClient依赖
<dependency>
    <groupId>io.github.openfeign</groupId>
    <artifactId>feign-httpclient</artifactId>
</dependency>
- 配置文件开启httpClient功能,设置连接数
openfeign:
  httpclient:
    hc5:
      enabled: true #支持httpClient开关
    max-connections: 100  # 最大连接数
    max-connections-per-route: 50 #单个路径最大连接数
Feign最佳实践(抽取)
抽取:顾名思义就是将Feign的部分抽离出来,单独创建一个模块进行编写,其他服务直接引用该模块就行
- 创建一个模块,将Feign部分进行抽取到该模块中
- 其他服务直接引用该模块。Feign模块中的Client包不能被spring扫描到,也就无法自动注入,这时有两种方案
- 方案一:给服务消费者的启动类的
@EnableFeignClients注解中添加Clients参数,传的是类字节码
- 方案一:给服务消费者的启动类的
@EnableFeignClients(defaultConfiguration = DefaultFeignConfiguration.class, clients = UserClient.class )
2. 方案二:给服务消费者的启动类的@EnableFeignClients注解中添加basePackage参数,指定FeignClient所在的包
@EnableFeignClients(defaultConfiguration = DefaultFeignConfiguration.class, basePackage = "cn.soutwind.feign" )
- 这时就可以启动了
搭建gateway网关
用户通过gateway网关来访问业务
- 创建子模块,引入相关依赖
    <dependencies>

        <!--  nacos注册中心   -->
        <dependency>
            <groupId>com.alibaba.cloud</groupId>
            <artifactId>spring-cloud-starter-alibaba-nacos-discovery</artifactId>
        </dependency>

        <!--    gateway网关    -->
        <dependency>
            <groupId>org.springframework.cloud</groupId>
            <artifactId>spring-cloud-starter-gateway</artifactId>
        </dependency>
		<!--  loadblancer必须,不然报错   -->
        <dependency>
            <groupId>org.springframework.cloud</groupId>
            <artifactId>spring-cloud-starter-loadbalancer</artifactId>
        </dependency>

    </dependencies>
- 配置application.yaml文件。包括基本信息,nacos地址,路由规则
spring:
  application:
    name: gateway
  cloud:
    nacos:
      server-addr: localhost:8848
    gateway:
      routes:
        - id: user-service  # 路由ID,必须唯一
          uri: lb://userService #路由目标服务地址
          predicates: #断言, 判断请求是否符合规则
            - Path=/user/**  #判断路径是否以/user/开头
        - id: order-service
          uri: lb://orderService
          predicates:
            - Path=/order/**
server:
  port: 10010
网关路由配置内容包括:
- 路由ID(- id):路由唯一标识,不能重复
- uri:路由目的地,支持
lb://服务名称和http://ip两种。 - predicates:路由断言,判断请求是否符合要求,符合则转发到路由目的地
- filters:路由过滤器,处理请求或响应
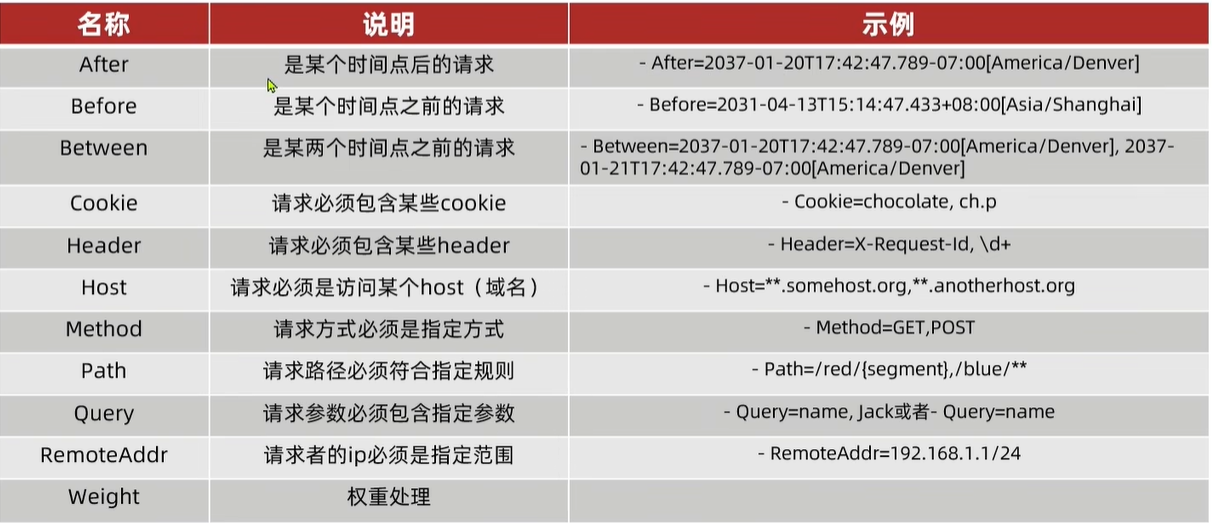
路由断言工厂
过滤器
当前过滤器
只会给被添加的服务进行过滤
spring:
  application:
    name: gateway
  cloud:
    nacos:
      server-addr: localhost:8848
    gateway:
      routes:
        - id: user-service  # 路由ID,必须唯一
          uri: lb://userService #路由目标服务地址
          predicates: #断言, 判断请求是否符合规则
            - Path=/user/**  #判断路径是否以/user/开头
        - id: order-service
          uri: lb://orderService
          predicates:
            - Path=/order/**
          filters:
          	- 过滤器
server:
  port: 10010
默认过滤器
默认对所有服务进行过滤
spring:
  application:
    name: gateway
  cloud:
    nacos:
      server-addr: localhost:8848
    gateway:
      routes:
        - id: user-service  # 路由ID,必须唯一
          uri: lb://userService #路由目标服务地址
          predicates: #断言, 判断请求是否符合规则
            - Path=/user/**  #判断路径是否以/user/开头
        - id: order-service
          uri: lb://orderService
          predicates:
            - Path=/order/**
      default-filters: # 默认过滤器
      	- 过滤器
server:
  port: 10010
全局过滤器(GlobalFilter)
全局过滤器的作用也是处理一切进入网关的请求和微服务响应,与GatewayFilter的作用一样。区别在于GatewayFilter通过配置定义,处理逻辑是固定的。而GlobalFilter的逻辑需要自己代码实现,定义方式是实现GlobalFilter接口。
- 自定义过滤器
package cn.gateway.filter;

import org.springframework.cloud.gateway.filter.GatewayFilterChain;
import org.springframework.cloud.gateway.filter.GlobalFilter;
import org.springframework.core.annotation.Order;
import org.springframework.http.HttpStatus;
import org.springframework.http.server.reactive.ServerHttpRequest;
import org.springframework.http.server.reactive.ServerHttpResponse;
import org.springframework.stereotype.Component;
import org.springframework.util.MultiValueMap;
import org.springframework.web.server.ServerWebExchange;
import reactor.core.publisher.Mono;

@Order(-1)
@Component
public class AuthorizeFilter implements GlobalFilter {
    @Override
    public Mono<Void> filter(ServerWebExchange exchange, GatewayFilterChain chain) {
        ServerHttpRequest request = exchange.getRequest();
        MultiValueMap<String, String> params = request.getQueryParams();
        String auth = params.getFirst("authorization");
        if ("admin".equals(auth)){
            return chain.filter(exchange);
        }
        ServerHttpResponse response = exchange.getResponse();
        response.setStatusCode(HttpStatus.UNAUTHORIZED);
        return exchange.getResponse().setComplete();
    }
}
全局过滤器对所有路由都生效,并且可以自定义逻辑
实现全局过滤器步骤
- 实现GlobalFilter接口类
- 添加@Order和@Component注解
- 编写处理逻辑
过滤器执行顺序
请求进入网关会碰到三类过滤器:当前路由的过滤器、DefaultFilter(默认过滤器)、GlobalFilter(全局过滤器)
请求路由后,会将当前路由过滤器和DefaultFilter、GlobalFilter,合并到一个过滤器链(集合)中,排序后依次执行每个过滤器
- 每一个过滤器都必须指定一个int类型的order值,order值越小,优先级越高,执行顺序越靠前
- GlobalFilter通过实现
Ordered接口,或者添加@Order注解来指定order值,由我们自己指定 - 路由过滤器和defaultFilter的order由spring指定,默认是按照声明顺序从1递增
- 当过滤器的order值一样时,会按照defaultFilter > 路由过滤器 > GlobalFilter的顺序执行
跨域配置
spring:
  cloud:
    gateway:
      # 全局的跨域请求
      globalcors:
        add-to-simple-url-handler-mapping: true #解决options请求被拦截问题
        cors-configurations:
          '[/**]':
            allowed-origins: # 允许哪些域名访问
              - "http://localhost:8090"
            allowed-methods:
              - "GET"
              - "POST"
              - "PUT"
              - "DELETE"
            allowed-headers: "*"  # 允许请求头携带的信息
            allow-credentials: true # 是否允许携带cookie
            max-age: 36000 # 这次跨域检测的有效期